|
home |
back |
BUANGI LANE | page 21 |

| first | < | 1 | 2 | 3 | 4 | 5 | 6 | 7 | 8 | 9 | 10 | 11 | 12 | 13 | 14 | 15 | 16 | 17 | 18 | 19 | 20 | 21 | 22 | 23 | > | last |
10 January 2011
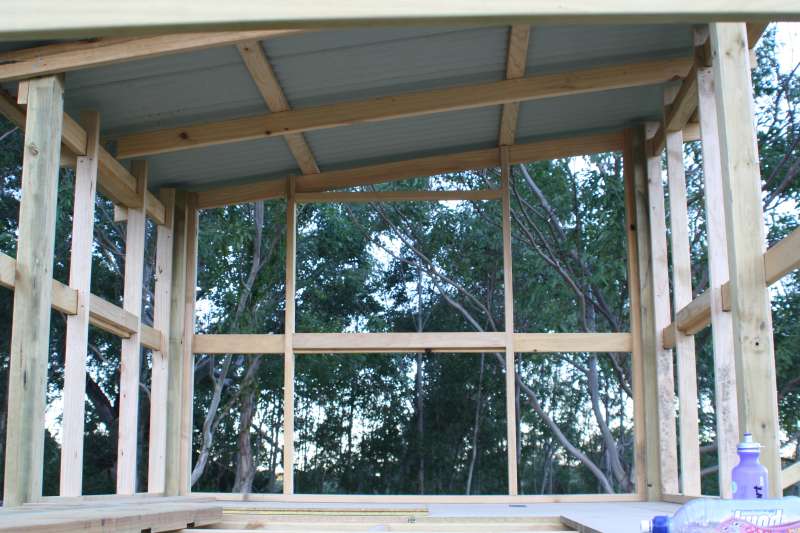
There has been some progress on the garage! Trev came and helped me put the rest of the cornice up. Then we got around to buying some more paint. The garage now has 2 coats of undercoat all over it. Carlyn wants a colour in the bedroom so if experimenting on the walls in the garage first. That's what the green patch in the corner is. I've also made a start on the steps out the back and a bit of a drain to hopefully stop the water pooling out there too. I wanted to use sleepers as the steps, then back-fill against them. I'm just not sure how to attach the sleepers to the side of the hill so they're nice and permanent. While I was digging I cleaned out the stormwater drain and dug 4 post holes for the vege patch fence.
 |
 |
 |
 |
 |
 |
13 January 2011
I was wandering around looking after the girls and they were in the sandpit and I had the camera with me so I thought I'd take a couple of pics of our setup as it stands now. Handily I'd just cut the grass too.
 |
 |
22 January 2011
Not much to report. I had the french doors open the other night on a beautiful evening and before the bugs came. The girls loved it and took their bean bags out for story time before bed. We also stuck a fence around the vege patch too. Well 3 sides anyway. We're still trying to find the right sort of gate we want so we know the size so we can get the last post in the right spot. In the meantime the wombats keep getting in for a dig.
 |
 |
27 February 2011
I looked at the garage floor the other day and wondered how clean it needs to be before I put paint on it. I should just pull my finger out and get it painted. The grass needed mowing again too. I found the new set of blades and whacked them on the mower. Wow, what a difference that made! So its all mowed again for another few weeks, at least it was so much quicker this time. I even managed to do the whipper snippering around the fence line. So for the first time in ages ALL the grass has been cut all at once. Amazing! I also slapped up a wall behind the bin enclosure to neaten that up. Spend a couple of hours flattening the hill out and filling in behind the wall too. That just about killed me!
 |
 |
 |
 |
10 March 2011
Made a start on the gateway at the top of the driveway. Only a start cause digging 900 deep holes through that sticky clay is very slow going. And then after I got the 1st post concreted in I was short to do the next hole. Plus I'd like to see if Trev has another tree that is more similar is size to the one that's in there, just so it all matches up. We're just building a bit of a gateway for now. We looked at gates, but the prices were a lot for what we wanted. Also took another picture of the view of the deck. Just cause it looks so nice and neat and green at the moment.
 |
 |
 |
 |
24 April 2011
The playground expansion continues! We were keen for a sandpit for the kids. They had the old pile of dirty river sand next to the tank, but its a bit ordinary. So I built a box and Carlyn and I dug a hole for it. Just need to steal the ute and grab some sand now. And the next bit of playground equipment is the cubby house. When dad was down for Tal's birthday he took us shopping to buy the timber for it. And Easter Sunday he was back down so we could make a start on it. We had a full day at it and got all the posts errected, floor frame done, roof trusses in place, and the floor down before it got too dark to keep going.
 |
 |
 |
 |
 |
 |
10 May 2011
After some hectic times of late looking after the cottages for Carol and Trev while they were in the US visiting Pete and Bel, I had a few spare hours to sort the roof. I stuck the battens on, and then dug all the sheets out from under the house. Of course the onese I needed were at the bottom of the pile again! Used the tin snips to hack...I mean precisely cut them to length. Screwed them all on and there we go, one roof. Luke would be proud of me...as long as he doesn't look too close :)
 |
 |
 |
16 May 2011
After spending Saturday on the mower getting the grass done I managed another day on the cubby. Got the wall studs for 3 walls put in. Doesn't look that different really, but seemed to take ages. Getting closer to being ready for cladding. Need to get some decking board and a ladder and then the kids can actually start using it without falling through the holes in the floor.
 |
 |
 |
 |
 |
22 May 2011
Got the last wall frame up, and found all the old decking boards under the house. Cut as many as I could get out, didn't quite make half way. So I'll need to buy some more decking boards. And the walls are now ready for cladding too. But again, I need to buy it. I was going to use the same stuff as the house, but it comes to $300. I might see what other materials I can find. So now progress has stopped till I order some more timeber/cladding.
 |
 |
 |
 |
 |
4 June 2011
Dad dropped in for a visit on his way back from Sydney, and Saturday morning he gave me a hand for a couple of hours so we could get the longer cladding boards up. It was a bit tricky with Maya needing pushes on the swings in between nailing sheets on. Then in the afternoon Talia helped by painting the ladder that I built. She did a really good job of it too, I thought she'd last about 2 minutes before getting bored with it.
 |
 |
 |
20 June 2011
I had a day after getting back from holidays so got some time to stick more boards on the outside. It was a bit slow going cause of all the cutting, but its looking good now. A few more fiddly cut boards and the cladding will be done. Then onto the decking boards and some proper bracing. The other weekend we also stuck a 1st coat of ironstone on the garage gables. Not 100% about it, the white that is on the house now looks good too. We'll get another coat on and then decide what to do on the house.
 |
 |
 |
 |
 |
 |
11 July 2011
We went and got a new trampoline seeing as the old one was beyond repair after its last trip on the wind. We got sandbags for the new one and made sure we put them on the legs as soon as it was set up. Then the wind blew for a couple of weeks straight. It made a right mess, there were tree's down everywhere. At one stage we went for 24 hours with no power, and had to take the chainsaw up to Trevs to clear trees so the guests could get out. It must have been blowy if it was enough to knock the swings over. And the sandpit we'd just topped up will need another load after it all blew away. But while it was horrible outside I got all the cubby deck boards cut and drilled in the shed.
 |
 |
 |
 |
31 July 2011
It only took a couple of weeks to get around to putting the deck boards on. But got an afternoon to spend on it, in between helping Carlyn set the net up on the tramp and pushing kids on the swings. Got there in the end though. It looks pretty good. Now to set the ladder and slippery dip up so the kids can use it before they grow out of it!
 |
 |
 |
 |
| first | < | 1 | 2 | 3 | 4 | 5 | 6 | 7 | 8 | 9 | 10 | 11 | 12 | 13 | 14 | 15 | 16 | 17 | 18 | 19 | 20 | 21 | 22 | 23 | > | last |